<center>06-Prerequisites-了解unix,netcdf,ldl</center>
参考资料
prerequisites-ww3.pdf;(2017)
链接:https://pan.baidu.com/s/1NXDRX2gP2CywqL6UBiSLlA 提取码:2hrk
内容
在本文档中,您将学习如何使用最常用的命令行在 UNIX 环境中工作,以及如何使用海洋学中常用的 netCDF 文件进行管理。
在附录 A 中,根据您的系统解释了 netCDF库的逐步安装。
在附录 B 中,根据您的系统解释了 IDL库的逐步安装。
Unix/Linux
基本命令
#	显示当前目录路径
pwd

#	显示当前目录文件和文件夹
ls

#
cd Documents
cd ..

#	回到用户主目录
cd
# or
cd ~
# or
cd $HOME

#	复制,移动,软连接,删除
cp fileA ../fileB
mv fileA ../fileB
ln -s fileA ../fileB
rm fileA

#	print
echo $HOME

#	print 显示文件内容
cat readme.txt

#	print 重定向文件
cat readme.txt > result.out 	#(to redirect and overwrite the log file result.out)
cat readme2.txt >> result.out 	#(to redirect and append in the log file result.out)
cat readme | less 				#(to display on the screen page by page)
cat readme.txt | tee result.out #(to print on the sceen and redirect in the log file result.out)

#	终端下的组合快捷键
Ctrl+C 			#(to quit a running application)
Ctrl+Shift+C 	#(to copy the selection)
Ctrl+Shift+V 	#(to paste the selection)
应用程序
#	安装包
apt-get install package 	#(ubuntu)
yum install package 		#(fedora)
port install package 		#(mac os x)

#	阅读pdf
okular manual.pdf

#	显示或修改图片
eog figure.jpg

#	编辑文件
gedit readme.txt
# or
vi readme.txt
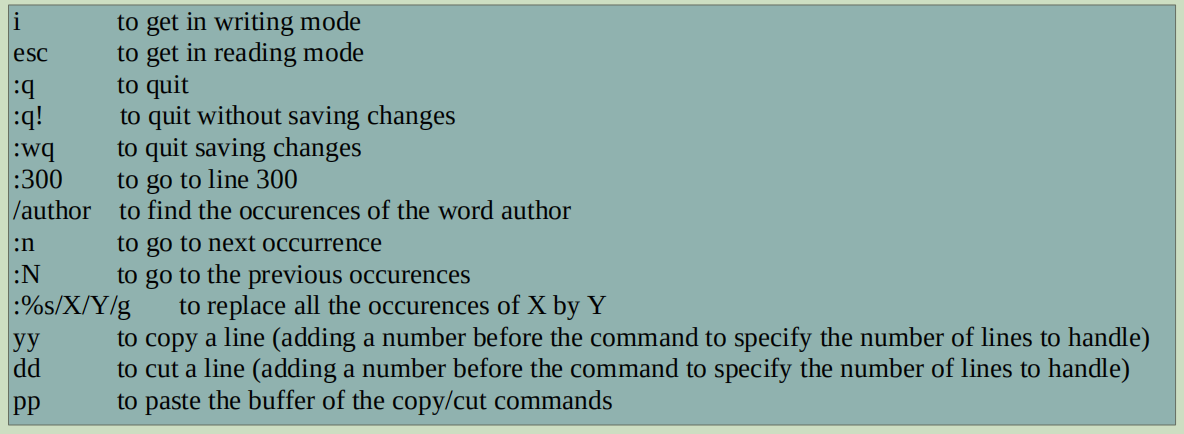
常用的 vi 命令
高级设置
#	显示是 bash 环境,还是 csh 环境
echo $SHELL
# If it display /bin/csh, you are using csh environment
# If it display /bin/bash, you are using bash environment

#	以下命令将取决于环境,csh 或 bash。
#	环境由环境变量和别名定义。环境存储在主目录中的隐藏文件中。
ls ~/.cshrc
# or
ls ~/.bashrc

#	当更改环境文件中的某些内容时,您必须 sourch 该文件以传播环境中的修改。
source ~/.cshrc
# or
source ~/.bashrc

#	定义(alias)别名的语法将根据 csh 或 bash 环境而变化:
alias idlww3 idl -rt=rt_visumain.sav 	#(for csh)
alias idlww3="idl -rt=rt_visumain.sav" 	#(for bash)

#	环境文件中定义的环境变量的语法也将发生变化:
setenv OASISDIR /home/$USER/work_oasis3-mct2.0 #(for csh)
export OASISDIR=/home/$USER/work_oasis3-mct2.0 #(for bash)

#	环境变量是 bin 文件夹的路径定义:
setenv PATH $PATH:/usr/local/bin #(for csh)
export PATH=$PATH:/usr/local/bin #(for bash)

#	环境变量是 library 文件夹的路径定义:
setenv LD_LIBRARY_PATH $LD_LIBRARY_PATH:/usr/local/lib #(for csh)
export LD_LIBRARY_PATH=$LD_LIBRARY_PATH:/usr/local/lib #(for bash)
netcdf
为什么选择 netcdf?
最常见的文件格式是被称为 ASCII格式的文本文件(扩展名为 .doc、.txt),你可以用普通的编辑器(如 word、gedit)阅读。这些 ASCII文件的问题是,它需要大量的空间,所以如果你以 ASCII格式存储模型数据或测量结果,它可以很快填满你的磁盘!
另一个选择是将你的数据存储为 二进制文件,如netCDF格式(扩展名为.nc),由于每个值都被写入文件中,所以使用的空间会比ASCII格式少得多。另一方面,你不能用之前提到的文本编辑器来阅读这种格式,为此你必须使用特定的工具来处理你的netCDF文件,简单的有 ncdump和 ncview。
netcdf 的结构组成
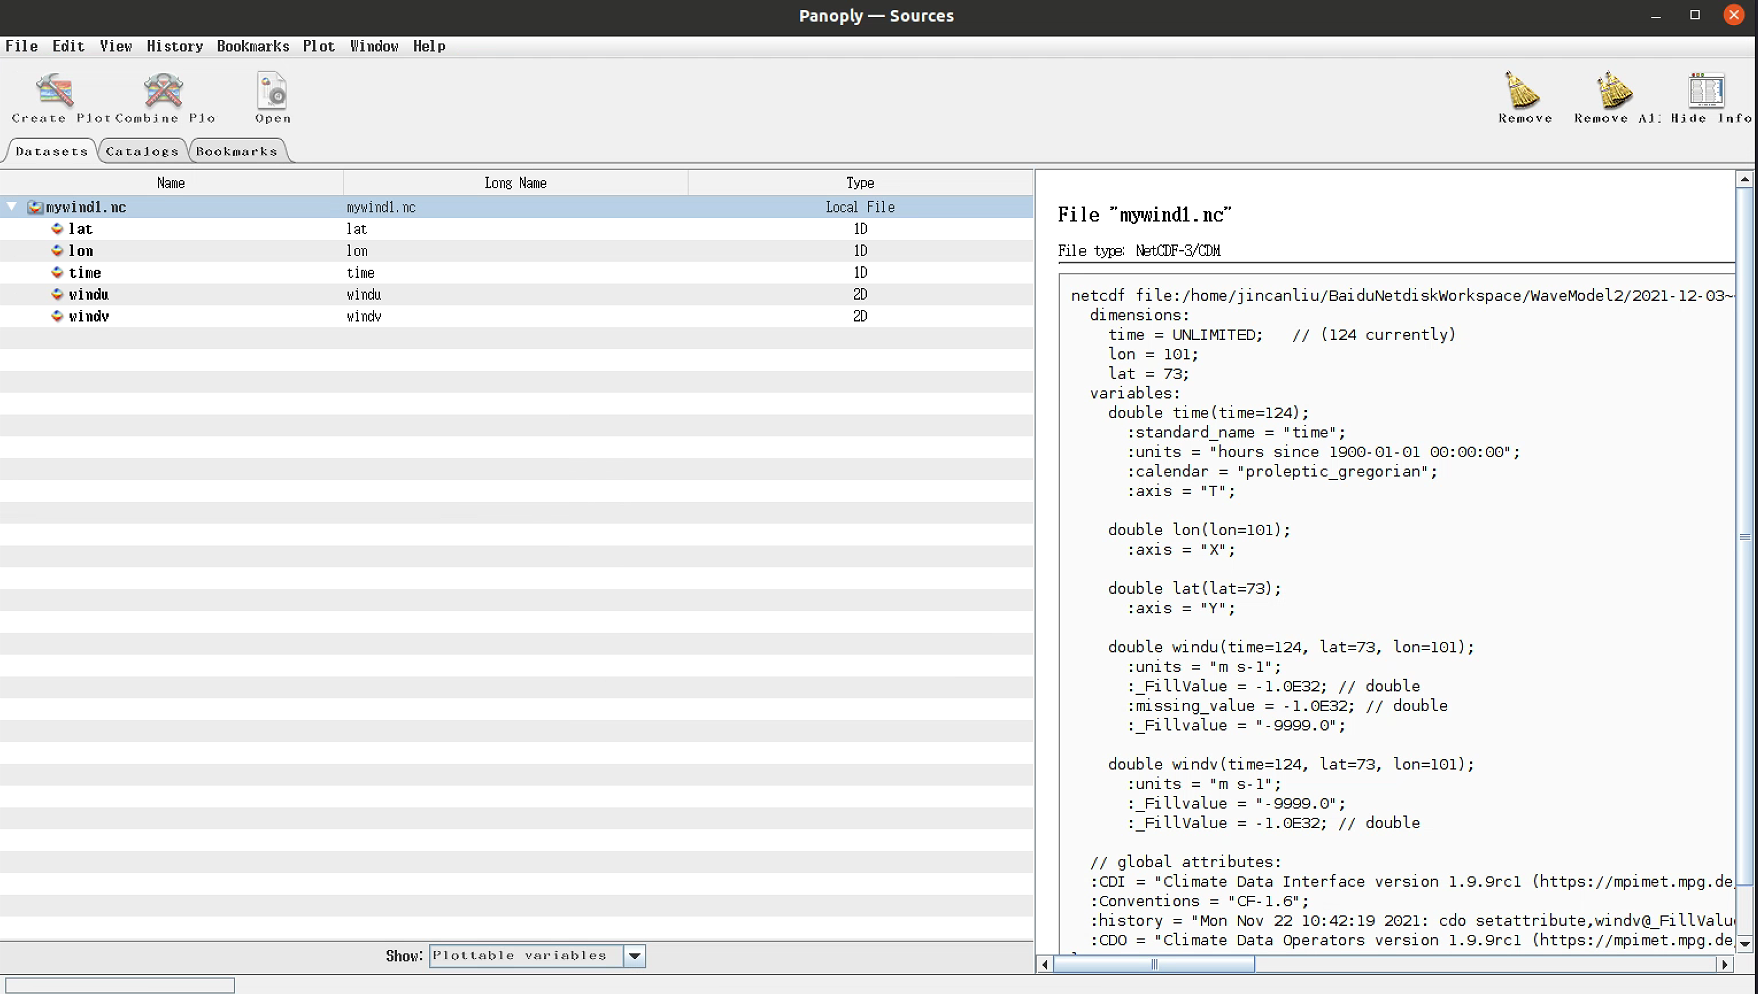
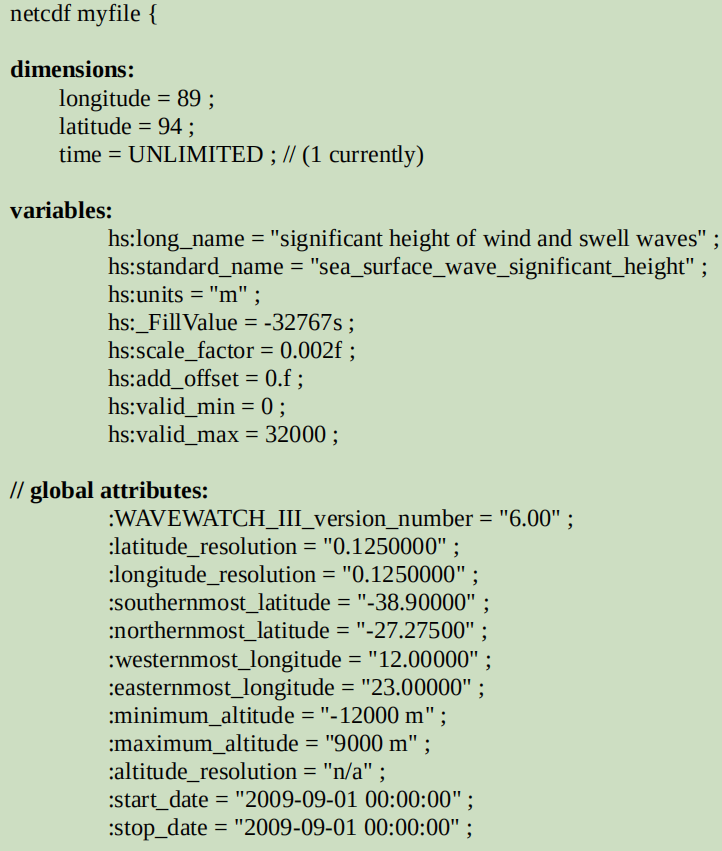
netCDF文件的通常结构分为两部分,文件头(header)和 数据。文件头分为3个部分,分别是 dimensions、variables、global attributes。每个变量由一个或多个维度定义,通常由一个或多个属性描述。
ncdump 和 ncview
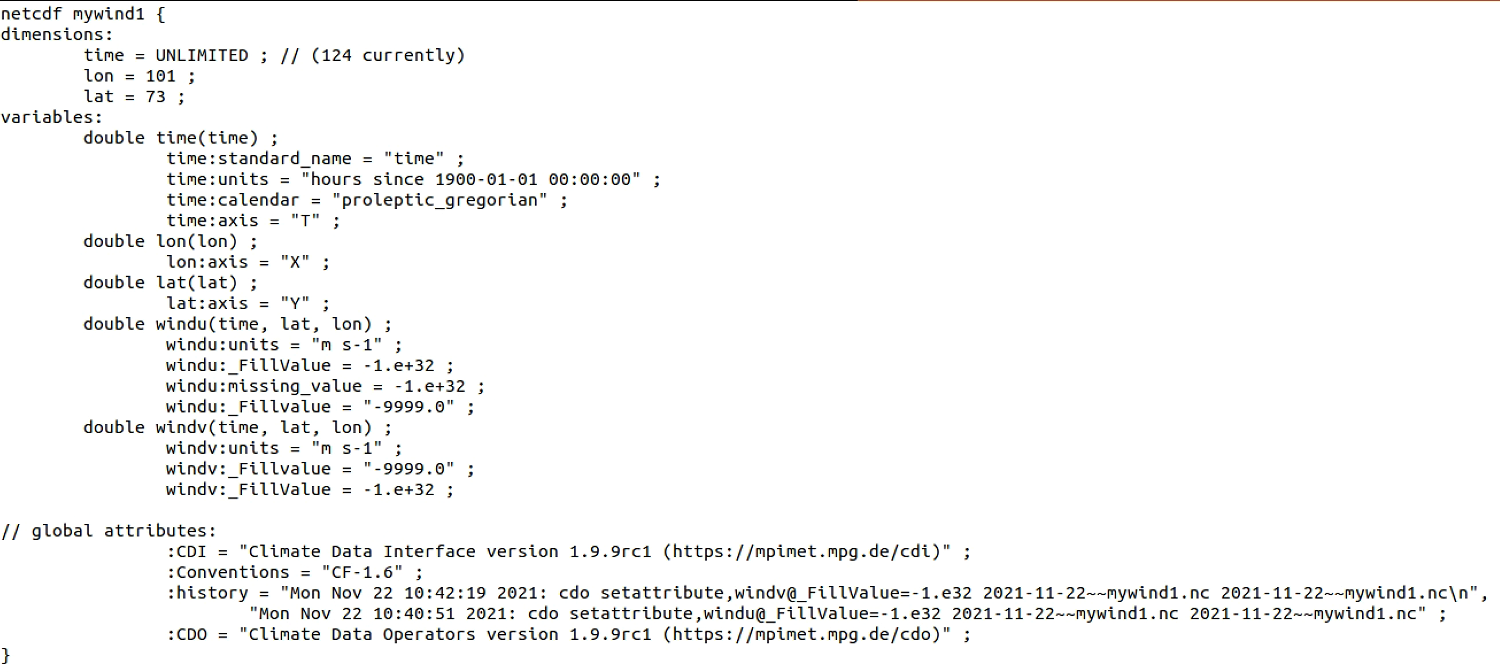
以一个 mywind1.nc文件为例。
链接: https://pan.baidu.com/s/13Hr8m1mrXHsbUeQTk8NfYQ 密码: jvdj
#	安装 ncdump
sudo apt install netcdf-bin

#	transcript all the content of your binary file into text:
ncdump mywind1.nc
# 不具有可读性

#	Well, you didn't had time to read all the content, you can either show it on your screen page by page:
ncdump mywind1.nc | less
# Linux less 命令: https://www.runoob.com/linux/linux-comm-less.html
# q 		退出
# 空格		是下一页
# b			是上一页
# 可读性好,且终端不会显示内容

#	redirecting all the transcripted content into a text file:
ncdump mywind1.nc > mywind1.txt
# or
ncdump mywind1.nc | tee mywind1.txt
# 可读性好,但还需要创建文件


#	输出 nc 的 header,使用 option '-h';
ncdump -h mywind1.nc

#	输出特定变量,使用 option '-v',例如 time;
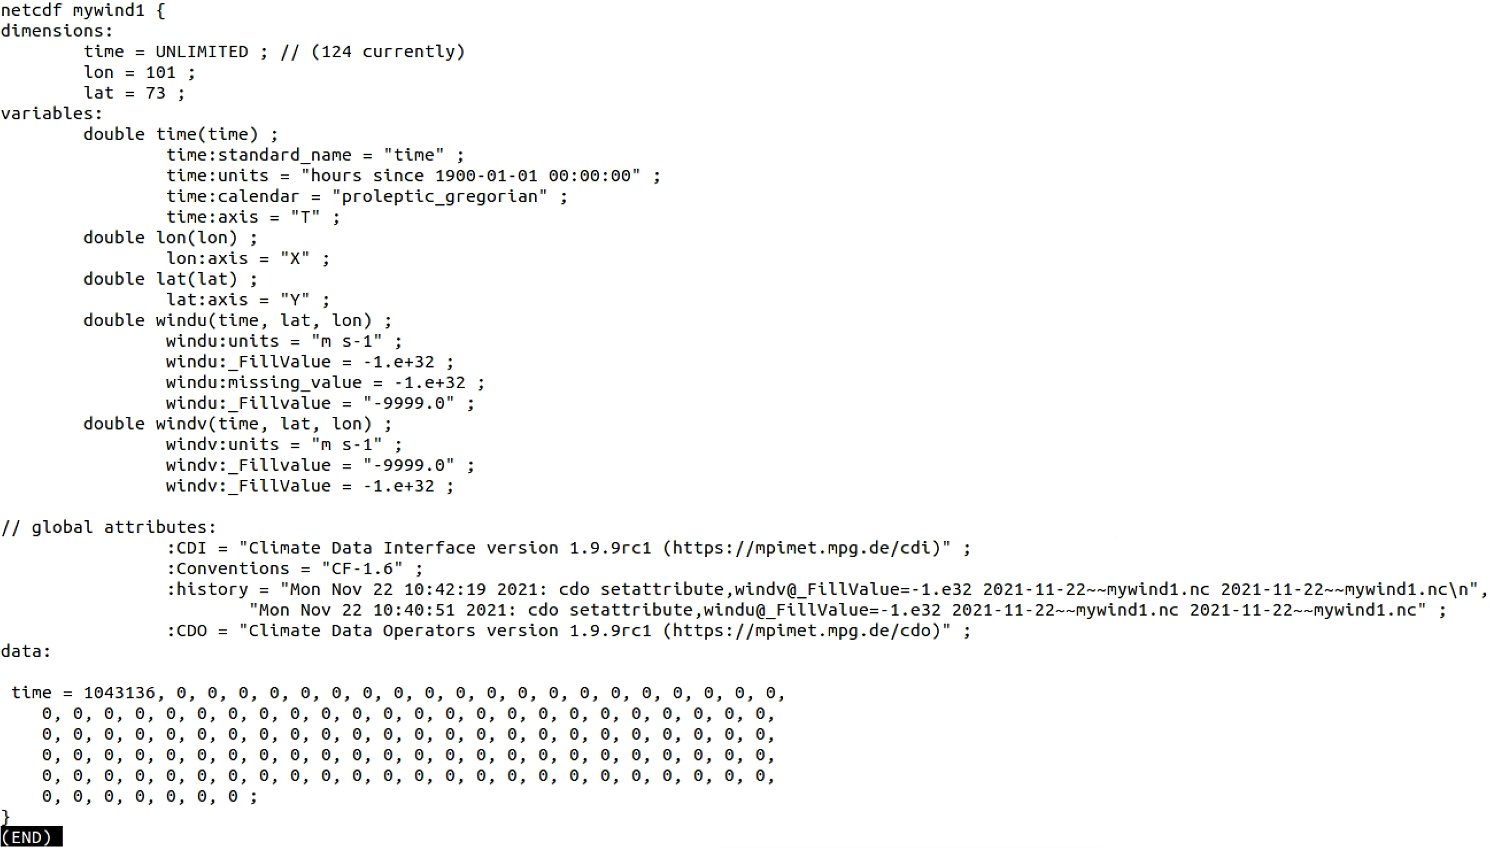
ncdump mywind1.nc -v time

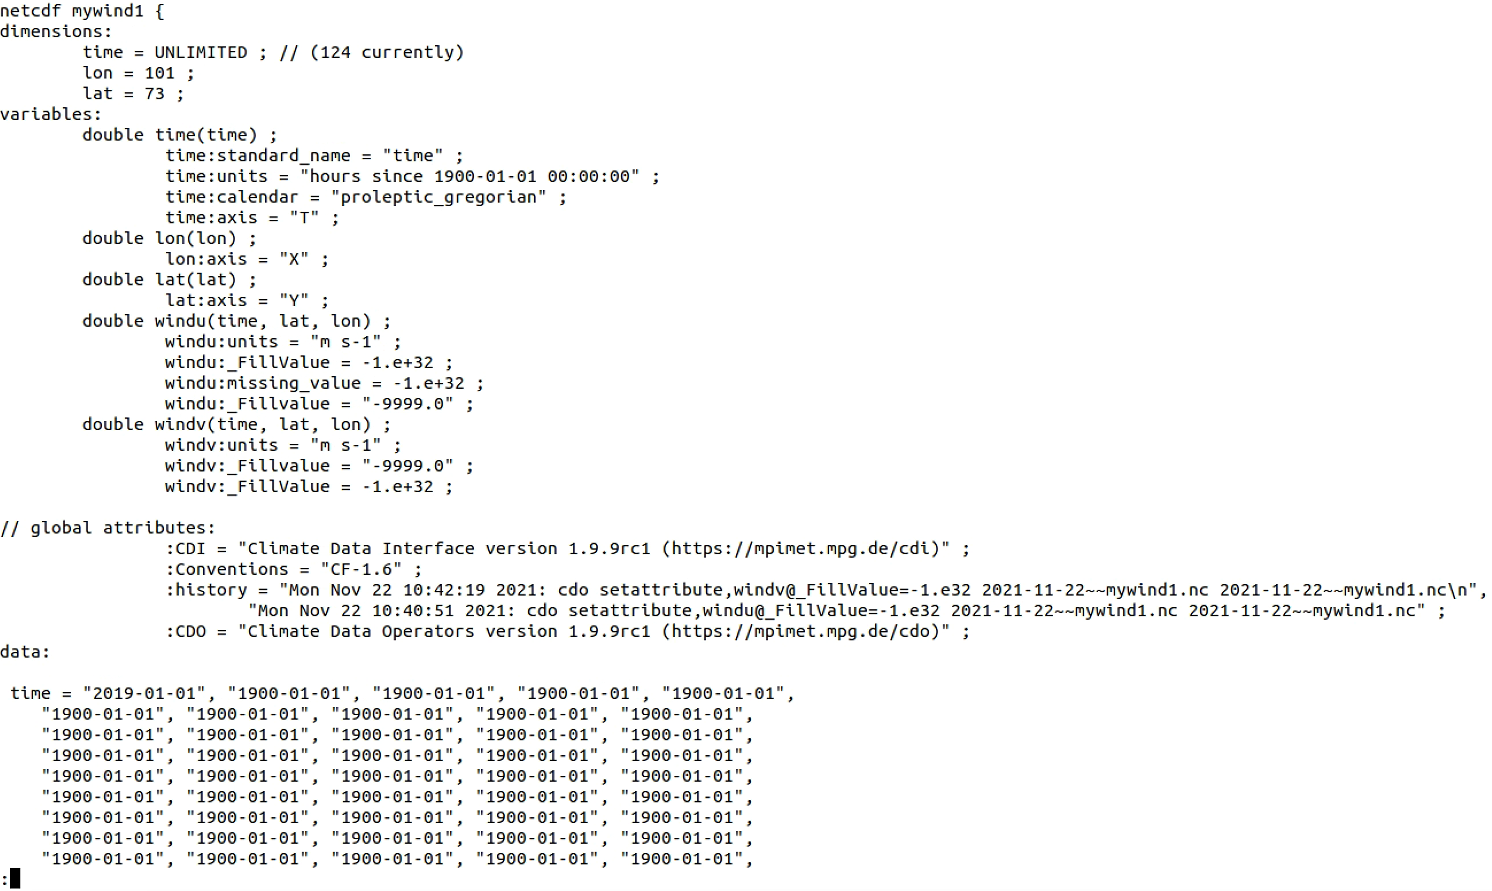
#	它会给你整数的浮点值,不是人类可读的,所以如果你的时间变量正确定义了属性“units”,
#	你可以使用选项“-t”来转换日期中的值:
ncdump mywind1.nc -v time -t

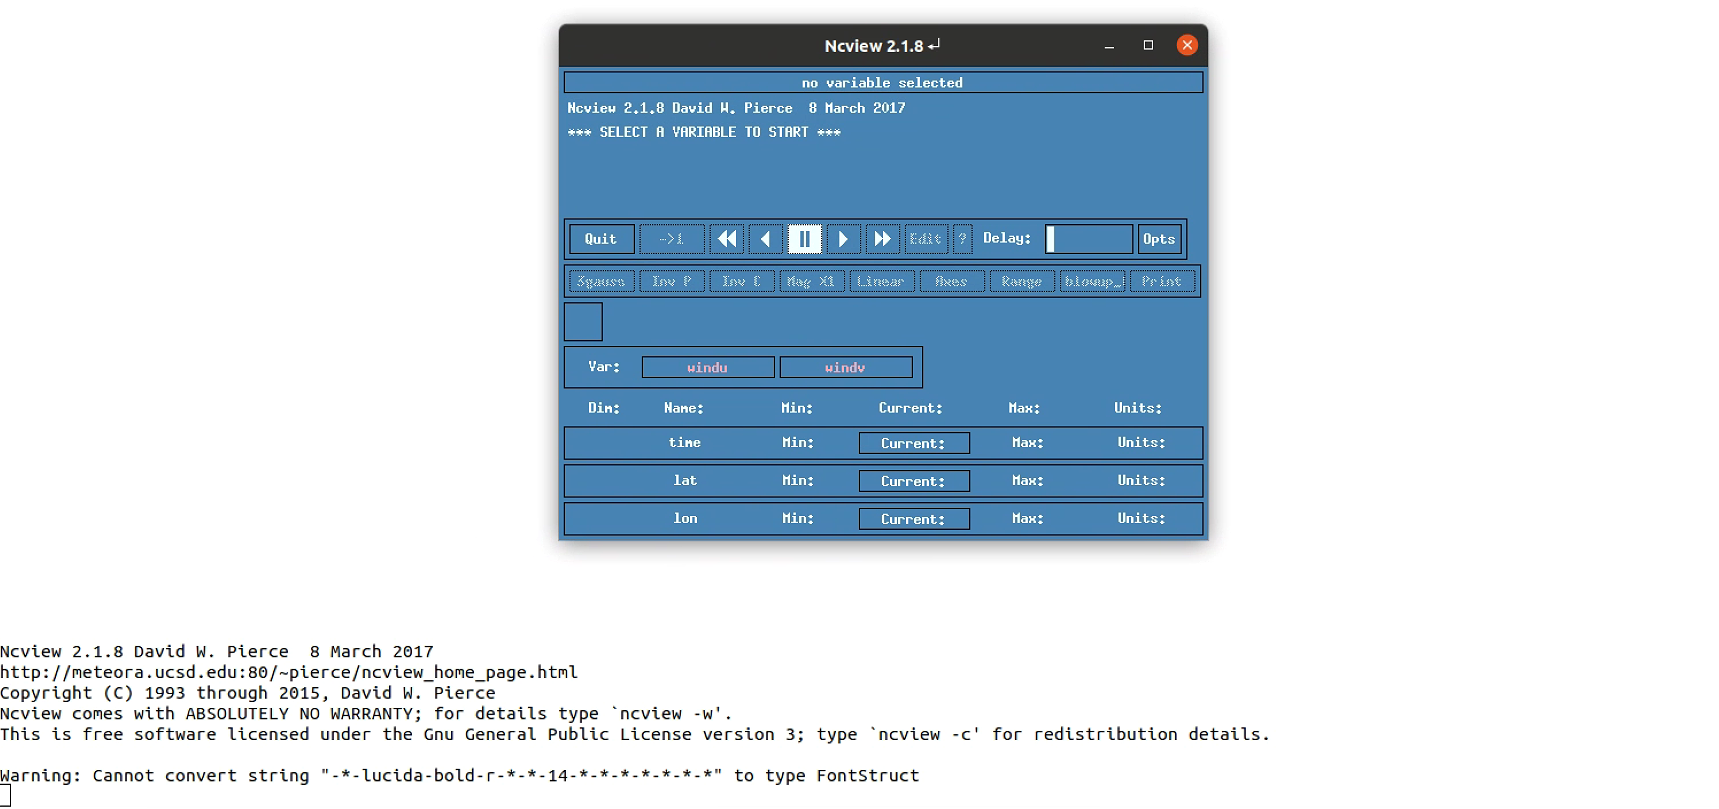
#	变量可视化
# sudo apt install ncview
ncview mywind1.nc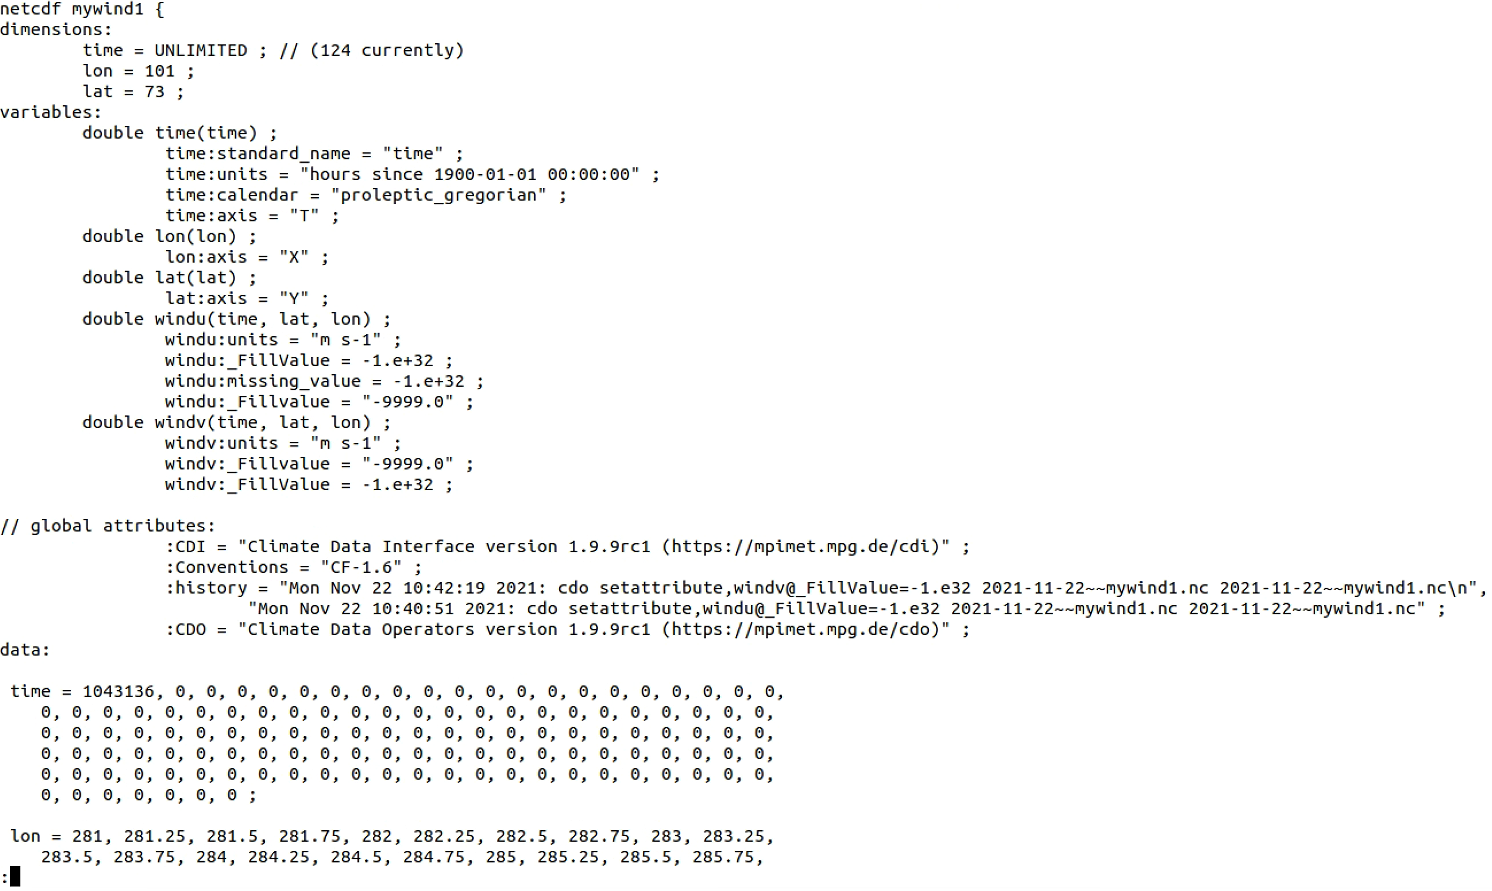
附录A:如何安装 netCDF library
见原文
附录B:如何安装 IDL librery
在ubuntu安装
安装
libxp6sudo apt-get install libxp6如果定位不到 libxp6 库,则需要从存档存储库中获取它。
wget -mnH --cut-dirs=5 http://archive.ubuntu.com/ubuntu/pool/main/libx/libxp/libxp6_1.0.2- 1ubuntu1_amd64.deb
sudo dpkg -i libxp6_1.0.2-1ubuntu1_amd64.deb
如果还是无法定位,提供deb下载的百度网盘链接: https://pan.baidu.com/s/1_W7VBcnV4bbpdMQBnexIpA 密码: e8ml,提供的deb版本是
libxp6_1.0.2-1ubuntu1_amd64.deb。这个 deb 文件是从
ubuntu 中文论坛得到的:下载
IDL安装文件夹cd $IDL wget -mnH --cut-dirs=5 ftp://ftp.ifremer.fr/ifremer/ww3/COURS/WAVE_DATA/IDL81/linux安装
IDLcd $IDL/linux chmod 775 install.sh sudo ./install.sh安装位置设置在
$IDL/IDL8.1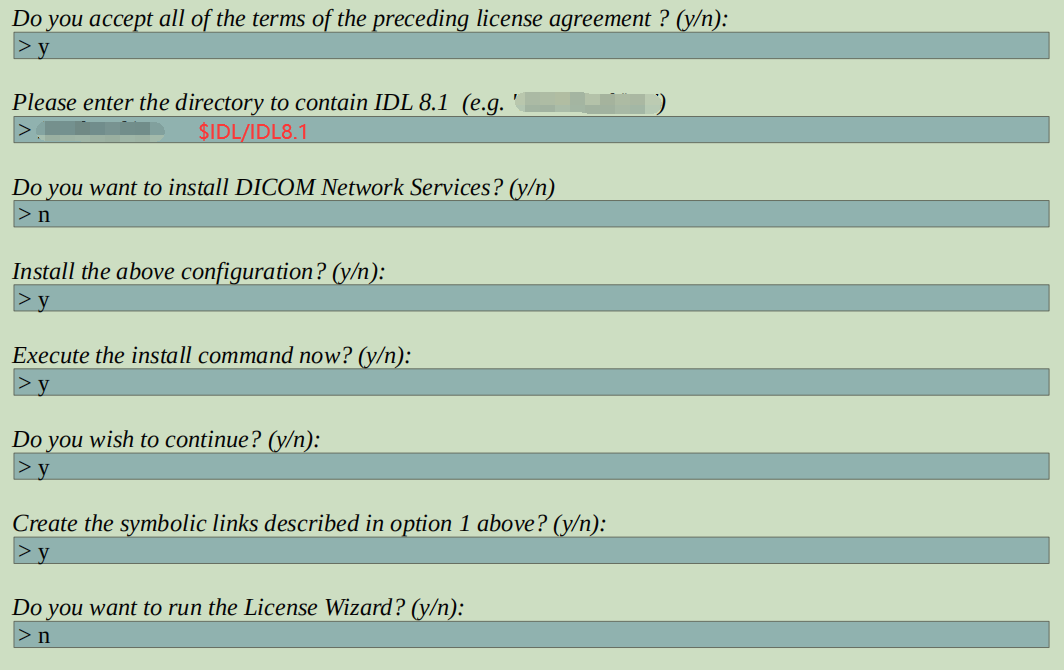
接下来会用到的软件
IDL的下载、安装在Prerequisites,基于IDL的TWIST的使用位于MESH-EDIT;
google-earth在ubuntu上的下载安装,INOUT教程 提供了;
polymesh的下载、安装、编译在polymesh ;
gridgen的下载、安装在gridgen ;
parvisu的下载、安装、适应位于TUTORIAL-POLYMESH的wave-workshop-exercise-polymesh.pdf额外练习;
ncview和ncdump的下载使用在Prerequisites的netcdf中;MATLAB可视化msh文件和nc文件在
MESH-RUN教程;
风场数据来源
INOUT教程,运行模型(真实强迫场)
主要的全球风力再分析是由
NCEP和ECMWF机构完成的。
NCEP,历史的CFSR从 1979 年到 2010 年:http://rda.ucar.edu/datasets/ds093.1/最新的一个是从 2011 年到现在的 CFSRR:http://rda.ucar.edu/datasets/ds094.1/
ECMWF,最新的是 ERA-5:https://climate.copernicus.eu/climate-reanalysis
谱边界文件创建
INOUT教程,运行模型(真实强迫场)
所需的最后一个输入是
谱边界(spectral boundary),以迫使你的<font color='red'>网格(边界)向大海开放</font>。
- 一种方法是运行
多网格模型来传达全球和区域网格之间的谱边界(参见TUTORIAL_MULTI)。- 另一种方法是首先运行一个
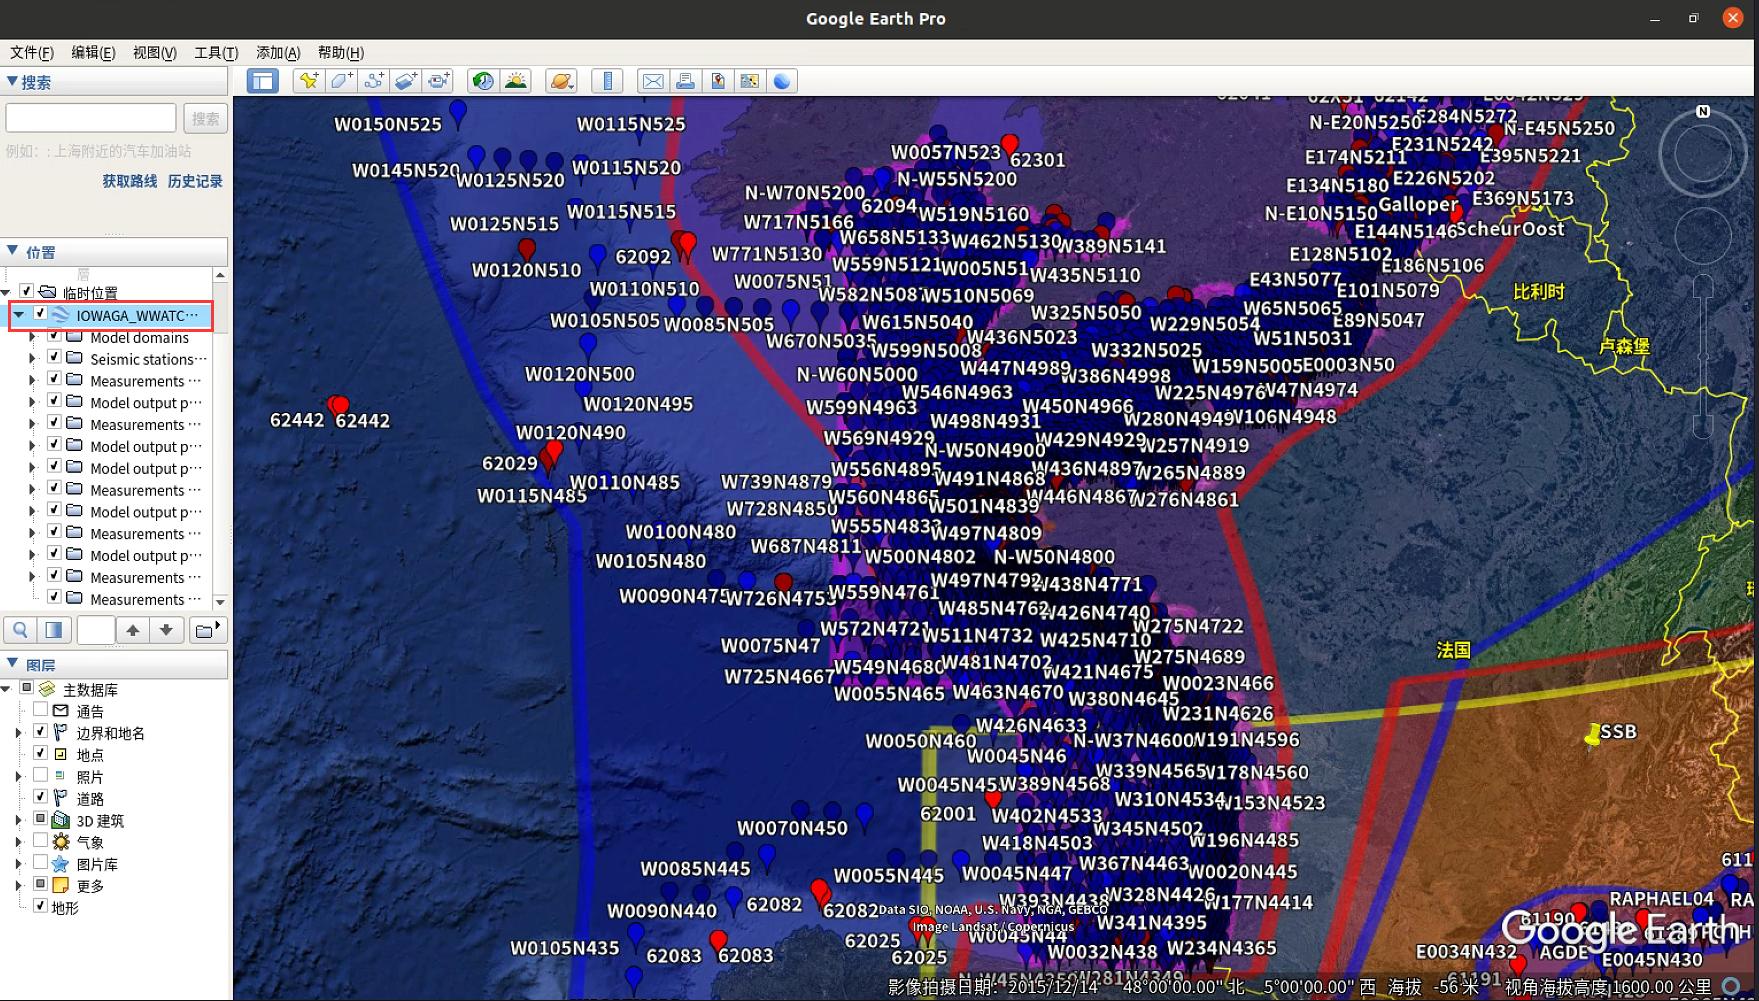
全球网格模型,然后输出区域网格所需的边界点。为此我们做了近 20 年的全球后报,我们在全球海岸线上每0.5度提供一个二维谱点。(请参阅我们的google-earth的kmz文件)。要可视化所有可用的谱文件,请在
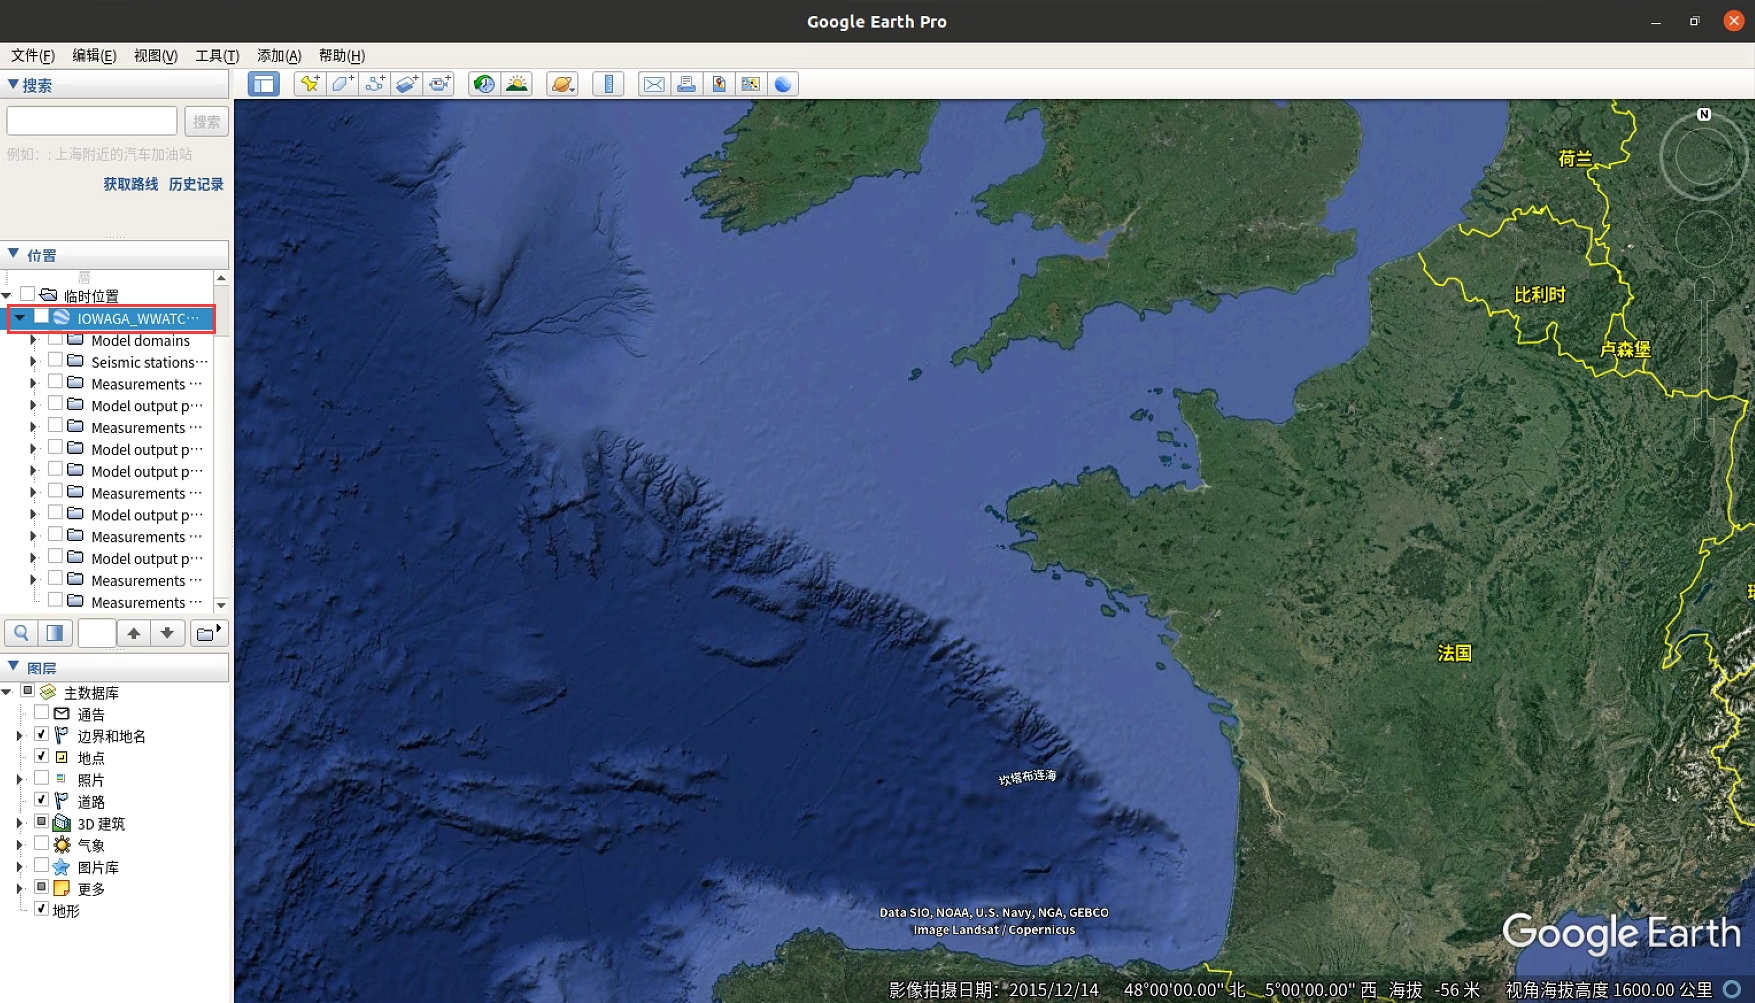
google-earth上打开我们的kml文件。open the google-earth on your local machine google-earth $WAVE_DATA/GOOGLE-EARTH-KMZ/IOWAGA_WWATCH_MULTI_output_points.kmz
google-earth的下载安装:## 参考网站 # https://www.codenong.com/f-install-google-earth-ubunu/ ## mkdir google-earth && cd google-wget https://dl.google.com/dl/earth/client/current/google-earth-stable_current_amd64.deb sudo dpkg -i google-earth-stable*.deb # deb包的百度网盘 # 链接: https://pan.baidu.com/s/1eW-OEXOa2PJv1JPionl0fw 密码: 11ku安装完成后,在软件菜单栏有
google-earth的图标,点击进入软件后,打开所需kml文件即可。
要自动查找特定网格所需的谱列表,请参阅教程
GRIDGEN中的附录 D。 如果没有netcdf谱数据,别担心今年(2019年)应该全部重做。GRIDGEN附录D–Define a polyline as domain boundaries with google-earth
运行
create_grid程序后,您可能需要定义特定的边界区域。 这可以通过google-earth应用程序来定义多边形。google earth select the polyline tool draw your polygon around your area, it can be an opened polygon save as kml file remove the first line of kml file然后就可以将
kml文件转换成多边形文件了。
请参阅GRIDGEN附录 C 以安装gmt工具。run kml2gmt to create .poly file rename output file to fname.poly put it in data directory set SELECT_BOUND =2 in namelist file run create_boundary program例如,2016 年北半球在 19W 和 19E 之间:
ftp://ftp.ifremer.fr/ifremer/ww3/HINDCAST/GLOBAL/2016_ECMWF/SPEC_NW19toE19/
对于本教程,您只需从数据文件夹中复制谱文件:
cp -r ../data/SPECTRA_NC .
